

How to Fit an Overdoor Pediment: Step-by-Step Guide

Before you start
A plaster overdoor pediment is a decorative piece that sits above an internal doorway. It frames the door, adds height to a plain opening and gives a hall or landing a period feel. Fitting one is a careful DIY job rather than a hard one: most of the work is in marking, checking and patience, and very little of it is in the fixing itself.
Decide first where it will go. Measure the door and the architrave and compare them with the width of the piece. Our guide to how to measure for an overdoor covers widths and the gap above the door, and do I need an overdoor pediment helps if you are still deciding. If the terms are unfamiliar, overdoor, door surround, architrave and pediment explained sets them out.
Pieces such as the Acanthus Overdoor Pediment are described on their listings as fixed centrally to a clean, dry surface with strong grab adhesive and supported until it has fully cured.[1][2] Adhesive, fixings, paint and tools are not included, so gather them first (see the checklist below).

Check the wall first
Adhesive is only as good as the surface under it. Before you buy anything, look at the wall above the door.
- Sound plaster or painted masonry: the best surface. Clean it, let it dry and lightly key any gloss paint so the adhesive has something to grip.
- Plasterboard or a stud wall: fine for a plaster piece of modest size if it is fixed and supported properly, but plasterboard has less strength than masonry. Check the piece's size and weight against the wall, and ask a builder if you are unsure.
- Old lath and plaster: common in older houses. It can be hollow, cracked or detached from the laths, often because of damp, rot or failing nails.[8] Tap it and test a small area first, and seek advice if it sounds loose.
- Damp, flaking or powdery surfaces: deal with the cause first. Adhesive will not hold on a surface that is coming away.
- Wallpaper: strip it from the fixing area so the adhesive bonds to the wall and not to paper.
Run a cable and pipe detector over the area as well. Cables to lights and switches often run close to doors, and it is far easier to learn that before you press a piece in place than after.

Position: height and centring
The most common reason a pediment looks wrong is position, not quality. Three things matter.
- Centre. Mark the centre of the door opening, not the centre of the wall. Transfer it to the back of the piece so you can line the two marks up.
- Height. Decide whether the piece sits directly on the architrave or has a small gap above it. Sitting on the architrave reads as one assembly, a gap reads as a separate feature. Hold the piece up and look from across the room before you commit. This is our rule of thumb, not a published standard.
- Room above. Check there is space between the top of the architrave and the ceiling, cornice or picture rail. A typical internal door leaf in England and Wales is 1981 mm (6 ft 6 in) high[3], and ceilings in many modern houses are around 2.4 m, so there is usually room for a shallow piece, but a tall carved piece in a low room can crowd the ceiling. The worked example below shows the arithmetic.
Width matters too: the piece should be a little wider than the opening, not the width of the wall. Our overdoor pediment ideas by door style and colour shows how different proportions look, and pediments on modern and internal doors covers shallow pieces for low ceilings.


Step by step
Work in this order. It looks like a lot of steps, but most are quick.
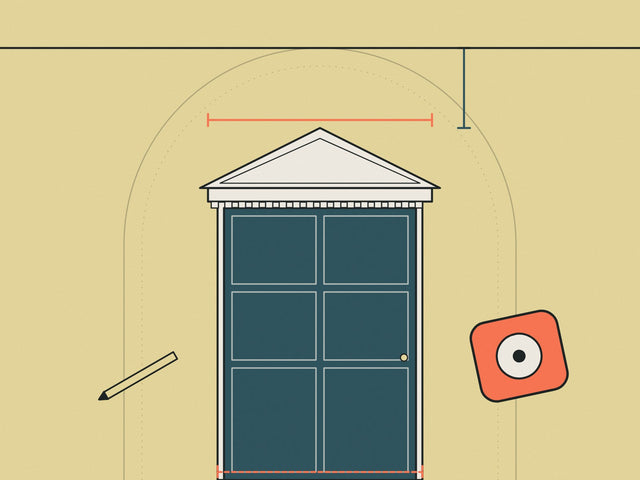
- Find and mark the centre. Measure the width of the door opening and mark the centreline on the wall above it with a light pencil line.
- Mark the bottom edge. With a helper holding the piece in its final position, draw a level line along its bottom edge and mark both ends. Check with the spirit level, not by eye: a door frame can be slightly out of true, and your line has to be level, not parallel to the frame.
- Scan the wall. Use the detector in the fixing area and mark any cables or pipes you find.
- Dry fit. Hold the piece against the marks. Check the ends, the centre and the gap above the architrave. Fix anything that looks wrong now.
- Prepare the surfaces. Wipe the wall and the back of the piece free of dust. Plaster is porous and the back of a cast piece can be dusty, so brush it off.
- Apply the adhesive. Follow the instructions on the adhesive. A continuous bead around the back, just inside the edge, plus lines or dabs across the middle, is a common pattern. Keep adhesive back from the edges so it does not squeeze out into the carved detail.
- Press and support. Offer the piece to your marks, press firmly and slide it a few millimetres to bed it. Check the level and centre again. Then support it so it cannot slip or sag while the adhesive cures. A batten wedged against the door frame, or props, with masking tape across the top edge, are common methods. Do not rely on the first grab alone.
- Leave it alone. Keep it supported for the full cure time stated on the adhesive. Do not slam the door or lean on it.

Pieces supplied in sections
Some wider pieces are supplied in sections. The Acanthus Overdoor Pediment listing says it is supplied in sections where required.[1] Dry fit all the sections together on a flat surface and then on the wall before you apply adhesive. Fix the centre section first, then work outwards, butting the joints tight and checking the level after each one. Fill the joints once the adhesive has cured. The same advice applies to a larger piece such as a 50.5 in (128 cm) single leaf[4]: more width means more weight and more to support.
Filling, caulking and painting
Once the adhesive has cured and the props are off, finish the joins. Fill any joint between sections with filler and sand it flush when dry. Run a thin line of flexible decorators' caulk along the top and sides where the piece meets the wall, smoothing it with a damp finger. Hand-cast plaster can have small pinholes and surface variations: this is part of the process, and a thin skim of filler before painting will hide them if they bother you.[1]
Paint is simple: the plaster takes ordinary emulsion. Seal bare plaster first, then apply two thin coats rather than one thick one, so the carving does not clog.[5] A piece supplied White Primed is ready for your topcoat. Use the same colour as the architrave for a calm look, or the wall colour for a subtle one. Our guide to painting plaster applies equally here.

Troubleshooting
| Problem | Likely cause | What to do |
|---|---|---|
| Piece is not centred | Centre marked from the wall, not the opening | Remove it while the adhesive is soft and re-fix; once cured, ask a builder |
| Bottom edge is sloping | Followed the door frame, not a level | Check with a long spirit level before the adhesive grabs |
| Gap at the ends | Wall not flat, or piece not pressed home | Fill and caulk before painting |
| Piece slips down | Adhesive not strong enough or not supported | Prop it up; use the correct grab adhesive; do not remove supports early |
| Cracks at a joint | Sections moved before curing | Fill, sand and repaint |
| Bare patches show through paint | Plaster not sealed | Seal, then apply two thin coats |
If the wall behind the piece is damp, hollow or failing, repair the wall first. A well-made decorative piece cannot fix a poor surface.

Safety, and when to ask a professional
- Two people. Plaster pieces are heavier than they look. Lift with a helper and use a stable stepladder, not a chair. Stepladders suit light, short-duration work on firm, level ground, with the steps facing the work.[6]
- Dust. Wear a mask and eye protection when sanding filler or plaster. Dry sanding of plaster and plasterboard products produces gypsum dust that the HSE treats as a health hazard, so keep sanding to a minimum and ventilate the room.[7]
- Cables. Scan before you fix. If you find unmarked cables, leave them alone and ask a qualified electrician.
- Fire doors. Do not fix anything to the door itself or to the door lining. The piece belongs on the wall. Fire doors should not be altered in any way, as changes can affect their ability to keep people safe.[9]
- Where to use it. The listings describe these pieces as interior pediments.[1] Do not use them outdoors unless the listing says they are suitable.
Ask a builder if the wall is lath and plaster that sounds hollow, if the piece is very large for the wall, or if you have any doubt about the surface. The printed instructions supplied with your piece take priority over this general guide, which sits alongside our fitting and painting guide.
Keep reading
- How to measure for an overdoor
- Do I need an overdoor pediment?
- Overdoor, door surround, architrave and pediment: what is the difference?
- Overdoor pediment ideas by door style and colour
- How to paint a plaster ceiling rose
Shop the look
 Acanthus Overdoor Pediment — 35 in
 Wellington Overdoor Pediment
 Acanthus Overdoor Pediment — 30–50.5 in
Frequently asked questions
How do you fix a plaster pediment above a door?
Mark the centreline and a level bottom edge, scan the wall for cables, dry fit, then fix with strong grab adhesive and support the piece until the adhesive has fully cured. Fill the joints, caulk the edges and paint.
Do I need to screw an overdoor pediment to the wall?
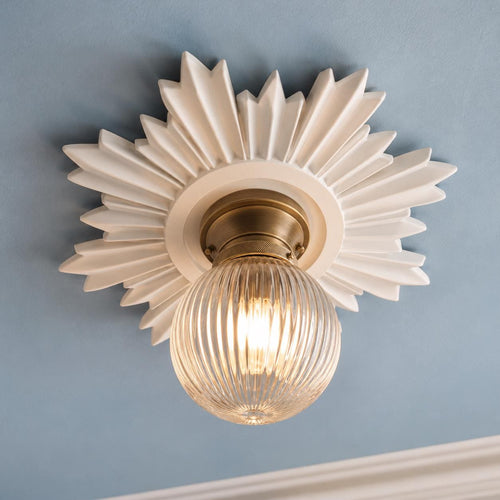
The listings for Flare pediments describe fixing with strong grab adhesive and supporting the piece until fully cured. Follow the instructions supplied with your piece, and ask a builder if the wall or piece is unusual.
Can I fit a pediment myself?
A careful DIYer can. The skill is in marking the centre and level accurately, preparing the wall and supporting the piece while it cures. Use a helper and a stable stepladder.
Should I paint the pediment before or after fitting?
Either works. Painting first is easier on the carved detail. Painting after lets you fill and caulk the joints so they disappear. Seal bare plaster and use two thin coats of emulsion.
How high above the door should the pediment sit?
Either directly on the architrave or with a small gap above it, depending on the look you want. Check there is enough room below the ceiling or cornice and look at it from across the room before fixing.
How long does the adhesive take to cure?
It depends on the adhesive. Read the label and keep the piece supported for the full time stated. Do not remove props early.
What if my wall is old lath and plaster?
Test the area first. If it sounds hollow or crumbles, repair it or ask a builder before you fix anything to it.
Can I use a pediment outside?
The listings describe these as interior pediments. Do not use them outdoors unless the listing says they are suitable.
Sources
References and further reading
Harvard style. Web pages were checked on the access date shown.
- Flare Studio UK (2026) Acanthus Overdoor Pediment — 35 in (product listing). Available at: flarestudio.uk/products/acanthus-overdoor-pediment-neocla... (Accessed: 27 October 2026).
- Flare Studio UK (2026) Wellington Overdoor Pediment (product listing). Available at: flarestudio.uk/products/wellington-overdoor-pediment-hand... (Accessed: 27 October 2026).
- Latham's Steel Security Doors (n.d.) A guide to UK standard door sizes. Available at: www.lathamssteeldoors.co.uk/blog/home-security/a-guide-to... (Accessed: 27 October 2026).
- Flare Studio UK (2026) Acanthus Overdoor Pediment — 30–50.5 in (product listing). Available at: flarestudio.uk/products/acanthus-single-leaf-overdoor-ped... (Accessed: 27 October 2026).
- Flare Studio UK (2026) Fitting & painting. Available at: flarestudio.uk/pages/paintable-plaster (Accessed: 27 October 2026).
- Health and Safety Executive (2005) Safe use of ladders and stepladders: An employers' guide (INDG402). Available at: warwick.ac.uk/services/healthsafetywellbeing/guidance/wor... (Accessed: 27 October 2026).
- Health and Safety Executive (2024) Construction dust: Sanding taped and covered plasterboard joints. Available at: www.hse.gov.uk/Construction/healthrisks/hazardous-substan... (Accessed: 27 October 2026).
- Wheatley, S. (2014) Repairing Lime Plaster Ceilings. The Building Conservation Directory. Cathedral Communications. Available at: buildingconservation.com/articles/lime-plaster-ceilings/l... (Accessed: 27 October 2026).
- Stevenage Borough Council (n.d.) Fire doors. Available at: www.stevenage.gov.uk/housing/council-housing/safety-in-yo... (Accessed: 27 October 2026).
How to cite this article
Tire, G. (2026) ‘How to Fit an Overdoor Pediment: Step-by-Step Guide’, The Flare Journal. Flare Studio UK. Available at: https://flarestudio.uk/blogs/journal/how-to-fit-an-overdoor-pediment (Accessed: 13 November 2026).
Shop the style




Conversation
Join the conversation
Questions about the history, a room you are planning, or a piece you have seen in the wild? Leave a comment and Joseph will reply.