

How to Choose a Tile Layout: Herringbone, Metro, Stack and Basketweave

What a tile layout is
A tile layout is the pattern in which tiles are arranged: in straight rows, offset like bricks, turned on the diagonal or woven into a herringbone. Choosing the layout is a design decision and an arithmetic one, because it decides how many tiles you buy, where the cuts fall and how the room looks. A long, narrow tile laid horizontally in herringbone can make a room look wider; laid vertically, it suggests height.[1]
Brick bond is the oldest idea here. In brickwork, a "bond" is a convention in which the vertical joints (perpends) should not line up across courses, and a stretcher bond is where each course is staggered by half a stretcher.[2] Tilers borrow the same logic. Brick bond with small rectangular tiles is often called metro or subway tiling; that name is common usage, not an official standard.
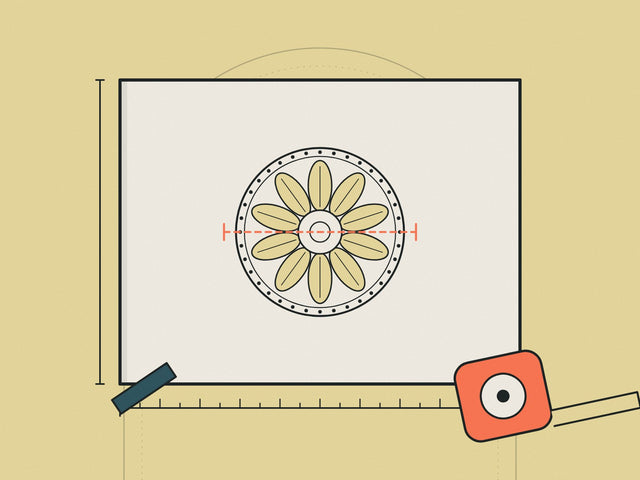
This guide takes you through six steps: choose the pattern, order the right amount, set out from a centre line, cut, fix and grout. There is a worked example for tile quantities and another for finding the centre line, with diagrams of both.
What you need
- Measure and mark: a tape, pencil, long spirit level and a chalk line.
- Space: tile spacers that match your joint width.
- Fix: a notched trowel, adhesive and clean buckets.
- Cut: a manual cutter, a wet saw for porcelain and 45-degree cuts, and nippers for notches.
- Finish: grout, a float, sponges and flexible sealant for corners.
- Protect: goggles, gloves and a dust mask when cutting.
For a wet room, a floor with underfloor heating, or any wall that will be wet most of the day, check the adhesive maker's current instructions or ask a professional tiler. The British Standard code for tiling in special conditions, BS 5385-4:2009, was withdrawn on 31 October 2015, so guidance now comes mainly from manufacturers and the tiling trade.[3]
Step 1: Choose the pattern
Topps Tiles lists the main layouts and the effect of each.[1]
- Brick bond (50:50). The traditional option, for tiles under 30 × 30 cm, with joints sitting centrally over the tile above. Laid horizontally it is a brick pattern, vertically a stepladder.
- Staggered brick bond (70:30). A contemporary option, usually for tiles over 30 × 60 cm, which helps hide any natural bow in the tile.
- Herringbone. Horizontal laying widens a space, vertical laying suggests height. Block and double-block versions give a more geometric look.
- Linear stack. Modern, especially with contrasting grout outlining each tile. Turn a square 45 degrees and you have a diagonal pattern, which suits narrow rooms.
- Basketweave. A parquet-style pattern made of plain tiles. Rectified-edge tiles work best with a 1 mm joint.
Wikipedia describes herringbone as an arrangement of rectangles, with the block edge length ratio usually 2:1 and sometimes 3:1, and says it can be done in wood, brick and tile, though laying it is hard because the small rows must be made to line up.[4] The Latin name for the same pattern in bricks, tiles or cut stone is opus spicatum ("spiked work"), and it was used constantly in Roman work, mostly as a decorative pavement.[5] If you want the Victorian look, encaustic tiles (the pattern is in different coloured clay, not glaze) were mass-produced after the Gothic Revival and are still laid in many British hallways and churches.[6]

Step 2: Work out how many tiles to buy
Every layout wastes tiles at the edges, and some waste far more than others. Suppliers give these guides:
- Straight stack: about 10% extra (CTD Tiles).[7]
- Brick bond: 10% extra, per Topps Tiles and CTD Tiles; diagonal brick bond needs about 15%.[1][7]
- Herringbone: 15% extra, because many tiles must be cut at 45 degrees (Topps Tiles and CTD Tiles).[1][7]
- Basketweave: 10–15% extra (CTD Tiles).[7]
- Rooms with many angles or niches: Pebble Tile Shop suggests 10 to 15% as the standard buffer, rising to about 20%.[8]
Worked example. A floor is 3.0 m by 2.4 m, so the area is 7.2 m². With a 10% allowance you need 7.2 × 1.10 = 7.92 m²; with 15% you need 7.2 × 1.15 = 8.28 m²; with 20% you need 8.64 m². If tiles come in boxes of 1.0 m², that is 8 boxes for stack or brick bond, and 9 boxes for herringbone. Buy a spare box of the same batch if you can, so you can mend a cracked tile in future, because shades vary between batches.
Step 3: Find the centre line and dry-lay
The most important rule is to set out before you stick anything. Pebble Tile Shop puts it clearly for herringbone: "every herringbone layout starts from a centerline, not a wall". Snap a chalk line down the middle, dry-lay a starter row, then work outward in both directions, shifting the start if you end up with slivers at the edge.[8] The same method suits most patterns.
Worked example. A wall is 2,330 mm wide, and you are using 300 mm square tiles with a 3 mm joint, so each tile plus joint takes 303 mm. Half the wall is 1,165 mm.
- Option A: centre a tile on the centre line. Half a tile is 151.5 mm, so 1,165 − 151.5 = 1,013.5 mm remain each side. Three whole tiles take 909 mm, leaving a cut of about 105 mm at each edge.
- Option B: put a joint on the centre line. Three whole tiles take 909 mm, leaving 1,165 − 909 = 256 mm at each edge.
Option B is better, because slim cuts of about 100 mm are fiddly and look thin. A common convention (our rule of thumb) is to avoid edge cuts of less than half a tile wherever you can. Move the starting point until both edges match. On a floor, do the same in the other direction, and check where the cuts fall in doorways and at the most visible edge. Pebble also suggests that a border of straight-laid tiles can contain a herringbone field and avoid thin edge pieces.[8]
Step 4: Cut the edge tiles
Dry-lay the pattern as far as the edges, mark each cut tile with a pencil, and number them on the back so you can lay them in order. Herringbone needs angled cuts, so a wet saw is much easier than a manual cutter. Allow extra time for corners, outlets and niches, as Pebble advises.[8] Cut one tile, check it, and cut the rest in batches.
Cut outside if you can, and wear goggles and a dust mask. Ceramic and porcelain dust is fine and irritating.
Step 5: Choose the joint
The joint (grout line) changes the look. Pebble Tile Shop gives typical widths of 1/16 to 1/8 inch (about 1.6 to 3.2 mm): the narrower joint looks sleeker but needs a flatter substrate and more precise preparation, while the wider joint is more forgiving.[8] Topps Tiles recommends rectified-edge tiles with a 1 mm joint for basketweave.[1] Choose a joint width first and buy matching spacers, because the joint decides the pitch in your set-out calculation, as in the worked example above.
Step 6: Fix, grout and finish
Follow the instructions on your adhesive and grout. In general practice (not a single source), spread adhesive over a small area, comb it with a notched trowel, press each tile in place with a slight twist, set spacers, and check the surface with a straight edge as you go. Wipe off adhesive before it sets. Leave the adhesive to cure for the time stated, then grout, wipe, and seal where required. Use flexible sealant, not grout, at internal corners and where tile meets a bath or shower tray.
If your bathroom lights sit near the tiles, remember that bathroom electrics have their own zones. Our guide to bathroom lighting zones and IP ratings explains where each type of light can go, and any fixed wiring is a job for a qualified electrician.
Quick reference: which layout and how much extra
Percentages are suppliers' guides.
| Layout | Typical use | Extra tiles | Source |
|---|---|---|---|
| Straight stack | Modern, strong grout lines | 10% | CTD[7] |
| Brick bond 50:50 | Tiles under 30 × 30 cm | 10% | Topps[1], CTD[7] |
| Staggered brick 70:30 | Tiles over 30 × 60 cm | 10%+ | Topps[1], CTD[7] |
| Diagonal brick bond | Narrow rooms | 15% | CTD[7] |
| Herringbone | Widen or add height | 15% | Topps[1], CTD[7] |
| Basketweave | Parquet feel | 10–15% | CTD[7] |
| Complex rooms | Many niches or angles | Up to 20% | Pebble[8] |
Common mistakes
- Starting at a wall. Walls are rarely straight; start from a centre line.
- Leaving slivers at the edges. Move the start point until the cuts are larger.
- Ordering too few tiles. Cuts, breakages and mixed batches will catch you out.
- Skipping the dry-lay. It is the cheapest way to avoid a mistake.
- Using grout at corners. Use flexible sealant where surfaces meet.
- Ignoring special conditions. Wet rooms, pools and heated floors need current manufacturer guidance.[3]
Glossary
- Bond: an arrangement that keeps vertical joints from lining up.[2]
- Herringbone: rectangles laid at right angles in a zigzag, often at a 2:1 ratio.[4]
- Opus spicatum: the Latin name for herringbone masonry.[5]
- Rectified tile: a tile cut after firing so edges are exact, which allows narrow joints.
- Pitch: tile width plus joint width.
- Lippage: an uneven edge where one tile sits higher than its neighbour.
- Encaustic tile: a tile with the pattern inlaid in coloured clay.[6]
What to do next
Make a scale sketch of your room and try two layouts on it. Our guide to bathroom lighting zones and IP ratings will help you place lighting around tiled walls, and our guide to styling a mantelpiece and shelves shows how a tiled fireplace surround can fit into a room.
Keep reading
- Bathroom lighting zones and IP ratings explained
- Can you put a ceiling rose in a bathroom or kitchen?
- How to style a mantelpiece and shelves
- Victorian terrace interior ideas
- How to make a small room feel bigger
Shop the look


Frequently asked questions
How much extra tile should I buy for herringbone?
Suppliers recommend about 15% extra for herringbone because many tiles must be cut at 45 degrees. Pebble Tile Shop suggests 10 to 15% as a standard buffer, up to about 20% for rooms with many angles or niches.
What is the best tile layout for a small bathroom?
There is no single answer. Brick bond suits small rectangular tiles under 30 × 30 cm, a diagonal layout can suit narrow rooms, and horizontal herringbone can make a space look wider. Dry-lay your options first.
Where do you start tiling a wall or floor?
From a centre line, not a wall. Snap a chalk line down the middle, dry-lay a starter row, then work outwards, adjusting the start so edge cuts are not slim slivers.
What is metro tile layout?
Metro (or subway) usually means small rectangular tiles laid in a brick bond, with each row offset from the one below. The name is common usage rather than a formal standard.
What is herringbone tile?
A layout of rectangles laid at right angles to each other in a zigzag. The edge ratio is usually 2:1, sometimes 3:1. It has been used since Roman times as opus spicatum.
How wide should grout joints be?
Typical joints are 1/16 to 1/8 inch (about 1.6 to 3.2 mm). Narrower looks sleeker but needs a flatter surface; wider is more forgiving. Rectified tiles for basketweave work best with about 1 mm.
Can I use the same layout on a wall and a floor?
Yes, but check that the tile is rated for the surface and that the layout works with the room. Floors need a flat, stable base; follow the adhesive maker's guidance.
Do I need a professional tiler?
Not for simple walls, but for wet rooms, heated floors, large-format tiles or complex patterns, a professional tiler can be worth it. Any new wiring for lighting must be done by a qualified electrician.
Sources
References and further reading
Harvard style. Web pages were checked on the access date shown.
- Topps Tiles (n.d.) What different laying patterns are there?, Topps Tiles. Available at: www.toppstiles.co.uk/knowledge-base/tiles/laying-patterns... (Accessed: 27 October 2026).
- Wikipedia contributors (n.d.) Brick bond, Wikipedia, The Free Encyclopedia. Available at: en.wikipedia.org/wiki/Brick_bond (Accessed: 27 October 2026).
- British Standards Institution (2008) BS 5385-4:2009 Wall and floor tiling – Design and installation of ceramic and mosaic tiling in special conditions. Code of practice (withdrawn 31 October 2015), BSI Knowledge. Available at: knowledge.bsigroup.com/products/wall-and-floor-tiling-des... (Accessed: 27 October 2026).
- Wikipedia contributors (n.d.) Herringbone pattern, Wikipedia, The Free Encyclopedia. Available at: en.wikipedia.org/wiki/Herringbone_pattern (Accessed: 27 October 2026).
- Wikipedia contributors (n.d.) Opus spicatum, Wikipedia, The Free Encyclopedia. Available at: en.wikipedia.org/wiki/Opus_spicatum (Accessed: 27 October 2026).
- Wikipedia contributors (n.d.) Encaustic tile, Wikipedia, The Free Encyclopedia. Available at: en.wikipedia.org/wiki/Encaustic_tile (Accessed: 27 October 2026).
- CTD Tiles (n.d.) Tile Layout Options, CTD Tiles. Available at: www.ctdtiles.co.uk/tile-layouts (Accessed: 27 October 2026).
- Pebble Tile Shop (2026) Herringbone Tile Pattern: The Complete Homeowner’s Guide, Pebble Tile Shop. Available at: www.pebbletileshop.com/blogs/news/herringbone-tile-patter... (Accessed: 27 October 2026).
How to cite this article
Tire, G. (2026) ‘How to Choose a Tile Layout: Herringbone, Metro, Stack and Basketweave’, The Flare Journal. Flare Studio UK. Available at: https://flarestudio.uk/blogs/journal/how-to-choose-a-tile-layout-herringbone-metro-stack-basketweave (Accessed: 12 November 2026).
Shop the style




Conversation
Join the conversation
Questions about the history, a room you are planning, or a piece you have seen in the wild? Leave a comment and Joseph will reply.