

How to Choose Skirting Boards and Architraves: Height, Profile and Fitting

What skirting boards and architraves do
A skirting board is the strip of timber, MDF or vinyl fixed along the bottom of a wall. It covers the joint between the wall and the floor, and it protects the wall from kicks, scuffs and furniture.[1] An architrave is the moulding that frames a door or window opening. In a modern house it is mainly decorative and hides the gap between the wall and the door lining; in classical architecture the same word names something quite different, the lowest part of the entablature, below the frieze and cornice.[2]
Both began as practical fixes. A trade writer at Atkey & Company describes them as ways of hiding the joins between floor and wall and between doorway and wall, which designers then shaped into profiles that changed with each era.[3] That is why they are worth choosing carefully. They frame every room, they tell you (and a buyer) what period a house belongs to, and a mismatch is one of the first things a trained eye notices.
This guide takes you from "what do I have?" to "what do I order and how do I fit it?" in six steps, with a worked example and a quick-reference table. If you want to read the period of a house from other clues first, start with our guide to identifying the period of your house from its plasterwork, then come back here.
What you need
You can choose skirting and architraves with nothing more than a tape measure. Fitting them needs a few more things:
- To measure and mark: a steel tape, a pencil, a spirit level and a small offcut of your chosen board to test against the wall.
- To cut: a mitre saw (or a hand saw and a mitre box) for 45-degree cuts, and a coping saw for scribed internal corners.
- To fix: grab adhesive, panel pins or finishing nails, a hammer and a nail punch. A pipe and cable detector is a sensible extra before anything goes into a wall.
- To finish: wood filler, decorator's caulk, fine sandpaper, primer and trim paint.
- To stay safe: goggles, a dust mask when cutting MDF or sanding, and a dust sheet.
Moving a socket or switch that sits in the way is a job for a qualified electrician, not something to improvise with a saw.
Step 1: Look at what the house already has
Walk round and note what is there before you shop. In a period home the best advice from the trade is to restore rather than replace, and, if the originals cannot be saved, to consider fixing new board over the old.[4] The profile and height of any existing board are your starting point.
If the house is listed, stop and check. Guidance from the New Forest National Park Authority says that removing timber or moulded plaster skirting boards from a listed building needs listed building consent, and that removal would be resisted where they are prominent and part of the building's special interest. The same leaflet says control applies equally to all grades, and that it is for the planning authority, not the owner, to judge whether a change needs consent.[5] Ask your local council before you strip anything. Our guide to door surrounds, architraves and pediments explains the parts of the opening in more detail.
Step 2: Choose the height
Height is the decision that changes the look most. There are three useful reference points, and they do not agree exactly, which is itself useful information.
A supplier's rule by ceiling height. Intrim Group recommends a 135 mm skirting for ceilings of 2,400 to 2,500 mm, 185 mm for 2,501 to 2,700 mm, 230 mm for 2,701 to 3,000 mm and 285 mm above 3,000 mm, with a 90 mm architrave up to 2,700 mm and 115 mm above.[6] Dividing each height by the middle of its ceiling band (my own arithmetic) gives roughly 1 part in 18 for the lowest band and 1 in 11 for the highest, so taller rooms get proportionally taller boards.
Typical heights by era. MDF Skirting World gives approximate ranges: Georgian 150 to 220 mm, Victorian 220 mm and upwards (sometimes near 300 mm in principal rooms), Edwardian 170 to 220 mm, interwar and post-war 70 to 100 mm. It also notes that before the late seventeenth century most rooms had no separate skirting at all, because full-height panelling did the job.[7]
What people actually buy. Homebuilding & Renovating says common heights run from 120 to 230 mm, that 145 mm is the most popular, and that 18 mm is the most common depth.[8]
Worked example: a Victorian terrace front room
Say the ceiling is 2.7 metres and the house dates from 1890. Intrim's guide points to 185 mm skirting and a 90 mm architrave.[6] The era guide points to 220 mm or more.[7] The two are 35 mm apart, which is the difference between "a bit slim" and "properly Victorian".
How to settle it: look at any original board in the hall or under the stairs, buy a one-metre length of your two candidates (say 195 mm and 225 mm), and pin each temporarily to the wall for a day. Judge them from the doorway in daylight. In a tall room the taller board usually looks right; in a small bedroom the shorter one is calmer. Trust your eye over any table.
Step 3: Choose the profile
The profile is the shape of the board's top edge, seen in section. Simple shapes (square edge, chamfer, pencil round) are plain and modern. Moulded shapes (ogee, torus) are traditional. Homebuilding & Renovating's advice, quoting a joinery specialist, is to use ogee or torus profiles of around 150 to 200 mm for Victorian and Georgian homes, simpler linear mouldings in natural finishes for Arts and Crafts homes, slim boards with a rounded or chamfered edge for mid-century homes, and square-edged or chamfered boards of 80 to 120 mm, or flush and shadow-gap skirting, for modern homes.[4]
Two practical points from the same source. First, keep one profile and finish through the connected rooms of the house, and adjust height only subtly in small rooms. Second, flush or shadow-gap skirting is hard and costly to retrofit, so plan it in at the start of a new build or extension rather than adding it later.[4] Painting the board a darker or tonal shade against lighter walls can frame the room; matching or contrasting both work.[4] Our guide to heritage colour palettes has period-correct colours to start from.
Step 4: Match the architrave to the skirting
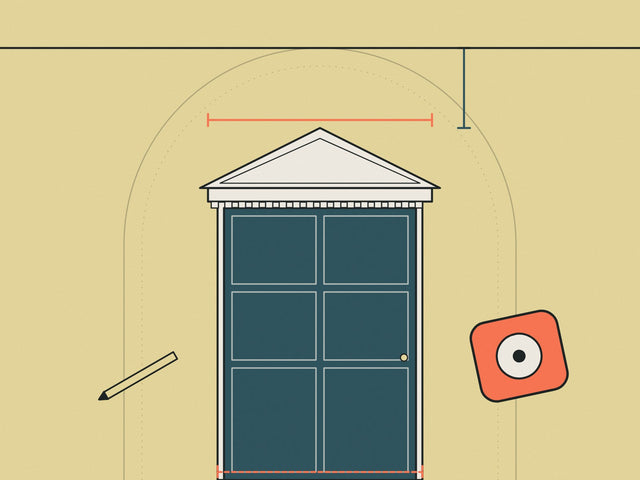
Choose the architrave in the same sitting as the skirting. The Intrim guide pairs a 90 mm architrave with skirting up to 185 mm and a 115 mm architrave with taller boards.[6] Two trade rules of thumb (not from a single source) keep the junction tidy. First, the architrave should be thicker than the skirting, so that the skirting's end can butt against it without standing proud. Second, if you use plinth blocks (square blocks at the foot of each leg), make them taller than the skirting so the board stops cleanly against the block, as in the diagram.
One detail of the head: Wikipedia notes that, in some joinery, the horizontal head sits over the vertical legs in a butt joint rather than a mitre.[2] Both are used. Whichever you choose, set the architrave back from the edge of the door lining by a small, even margin (about 6 mm is common), so a sliver of the lining shows as a "reveal".
Step 5: Measure and order
Measure each wall along the floor, in metres, and add them up. Subtract the width of each door opening, because skirting stops at the architrave. Then add an allowance for cuts and mistakes: 10% is a common trade rule of thumb, more if the walls are crooked or you are new to scribing.
Worked example. A 4.2 m by 3.6 m room has a perimeter of 2 × (4.2 + 3.6) = 15.6 m. Take off one 0.9 m door opening and you have 14.7 m to cover. Add 10% (1.47 m) and you need 16.2 m. Boards usually come in 2.4 m lengths, so 16.2 ÷ 2.4 = 6.75, which rounds up to 7 lengths (16.8 m). For the architrave, count the sides: a standard door needs two legs and a head, so three pieces, plus a second set for the other side of the door if both faces are being trimmed. Chimney breasts, alcoves and bay windows add run, so measure those walls on their actual line, not the straight room dimensions.
Step 6: Cut, fix and finish
Here is the order most fitters follow. It is common practice rather than a fixed rule, so adapt it to the room.
- Prime first. Prime all faces and the back of the boards before fixing. It is easier to do on trestles than on the wall.
- Fit the architrave. Mark an even margin along the lining, cut the legs to length, then cut the head with a mitre or square end to suit your joint, and test fit before any adhesive.
- Plan the skirting runs. Start on the longest, straightest wall. Put full lengths where they show, and make any joints as 45-degree scarfs.
- Corners. Mitre every external corner at 45 degrees. For internal corners either mitre or scribe: fix the first board square into the corner, then cut the profile on the second board to fit the first. Scribing copes better when the walls are out of square.
- Fix. Use grab adhesive and nails or pins into solid fixings. Check for pipes and cables first with a detector. If you meet a socket or a switch in the way, the circuit work is for a qualified electrician.
- Fill and caulk. Fill nail holes, run decorator's caulk along the top edge where the board meets the wall, and sand when dry.
- Paint. Apply trim paint in two thin coats, brushing along the grain.
Quick reference: heights and sizes
Use this as a starting point, then adjust to the house in front of you. The figures come from the sources shown and are guides, not standards.
| Situation | Skirting height | Architrave | Source |
|---|---|---|---|
| Ceiling 2,400–2,500 mm | 135 mm | 90 mm | Intrim[6] |
| Ceiling 2,501–2,700 mm | 185 mm | 90 mm | Intrim[6] |
| Ceiling 2,701–3,000 mm | 230 mm | 115 mm | Intrim[6] |
| Ceiling over 3,000 mm | 285 mm | 115 mm | Intrim[6] |
| Georgian house | 150–220 mm | Match originals | MDF Skirting World[7] |
| Victorian house | 220–300 mm | Match originals | MDF Skirting World[7] |
| Edwardian house | 170–220 mm | Match originals | MDF Skirting World[7] |
| Modern or 1930s–1970s house | 70–120 mm | Slim, plain | MDF Skirting World[7], Homebuilding[4] |
| Most popular today | 145 mm, 18 mm deep | n/a | Homebuilding[8] |
Common mistakes
- Boards too small for the room. Tall ceilings make slim skirting look mean. Test a length before you buy the lot.
- Stripping original boards in a listed building. Removal needs consent.[5]
- Architrave thinner than skirting. The skirting end then sits proud and looks clumsy.
- Forgetting the floor. Fit boards after the floor is down, and follow the floor maker's advice on expansion gaps.
- Fixing blind. Always check for pipes and cables before nailing.
Glossary
- Architrave: the moulding that frames a door or window opening.[2]
- Skirting board (baseboard): the board along the bottom of a wall.[1]
- Profile: the shape of the board's top edge seen in section.
- Plinth block: a square block at the foot of an architrave leg, taller than the skirting.
- Mitre: two pieces cut at 45 degrees to meet at a right angle.
- Scribe: cutting one board's end to fit the face of another, for internal corners.
- Reveal: the strip of door lining left visible between lining edge and architrave.
- Dado rail: a rail at about chair-back height, originally to protect walls from chairs.[9]
What to do next
Once the boards are in, the room's other details will fall into line. Our guide to styling a hallway with architectural details shows how skirting, door surrounds and light fit together. If you are adding panelling above the skirting, read how to panel a wall. And for period character in a Victorian house, see our Victorian terrace interior ideas.
Keep reading
- Styling a hallway: architectural details
- Overdoor, door surround, architrave and pediment: the difference
- Victorian terrace interior ideas
- A guide to Georgian interiors
- How to panel a wall: Shaker and picture-frame panelling
Shop the look


Frequently asked questions
What height should skirting boards be?
It depends on the ceiling and the period. One supplier recommends 135 mm for ceilings of 2,400 to 2,500 mm, 185 mm for 2,501 to 2,700 mm, 230 mm for 2,701 to 3,000 mm and 285 mm above that. Period guides give about 150 to 220 mm for Georgian and 220 mm or more for Victorian. The most popular height sold today is 145 mm.
What is the difference between skirting boards and architraves?
A skirting board runs along the bottom of a wall and covers the joint with the floor. An architrave frames a door or window opening and hides the gap between the wall and the lining.
How wide should an architrave be?
One supplier pairs a 90 mm architrave with skirting up to 185 mm and a 115 mm architrave with taller boards. Choose the architrave and the skirting together so the architrave is thicker than the skirting.
Should skirting boards match the architraves?
They should look related. Using the same style of profile and finish keeps a room consistent, and the architrave should be thicker than the skirting so the board can butt against it neatly.
Do I need consent to remove skirting boards in a listed building?
Yes in many cases. Guidance from the New Forest National Park Authority says removal needs listed building consent and would be resisted where the boards are prominent and part of the special interest. Ask your local planning authority before you start.
Should I mitre or scribe internal corners?
Both work. Scribing copes better when walls are out of square, because the second board is cut to fit the face of the first. A mitre is quicker on square, modern corners.
How much extra skirting should I order?
Add about 10% to your measured length for cuts and mistakes. That is a common trade allowance rather than a fixed rule, so add more for crooked walls or if you are new to scribing.
Do I need a qualified electrician to fit skirting boards?
No, but if a socket or switch is in the way and needs moving, that job needs a qualified electrician. Always check for hidden pipes and cables before nailing.
Sources
References and further reading
Harvard style. Web pages were checked on the access date shown.
- Wikipedia contributors (n.d.) Baseboard, Wikipedia, The Free Encyclopedia. Available at: en.wikipedia.org/wiki/Baseboard (Accessed: 27 October 2026).
- Wikipedia contributors (n.d.) Architrave, Wikipedia, The Free Encyclopedia. Available at: en.wikipedia.org/wiki/Architrave (Accessed: 27 October 2026).
- Costello, M. (2023) Architectural mouldings – a quick history lesson to remind us of their importance in establishing authenticity, Atkey & Company. Available at: atkeyandco.com/architectural-mouldings-a-quick-history-le... (Accessed: 27 October 2026).
- Dyson, G. (2025) This is how to match your skirting boards to your interior style according to the experts, Homebuilding & Renovating. Available at: www.homebuilding.co.uk/home-improvements/matching-skirtin... (Accessed: 27 October 2026).
- New Forest National Park Authority (2013) Listed buildings: Interiors (leaflet NPA 00150), New Forest National Park Authority. Available at: www.newforestnpa.gov.uk/app/uploads/2018/03/ListedBuildin... (Accessed: 27 October 2026).
- Intrim Group (published on ArchiPro) (2025) Choosing the Right Size Mouldings for Your Home, ArchiPro. Available at: archipro.com.au/article/choosing-the-right-size-mouldings... (Accessed: 27 October 2026).
- MDF Skirting World (2026) The History Of Skirting Boards | Origins & Modern Designs, MDF Skirting World. Available at: mdfskirtingworld.co.uk/blog/history-of-skirting-boards/ (Accessed: 27 October 2026).
- Brinsmead, N. (2022) Skirting Board Sizes Explained: How to Choose the Right Size, Homebuilding & Renovating. Available at: www.homebuilding.co.uk/advice/skirting-board-sizes (Accessed: 27 October 2026).
- The Victorian Society (2024) Victorian and Edwardian plaster mouldings, cornices, coving and dado rails, The Victorian Society. Available at: www.victoriansociety.org.uk/advice/plaster-mouldings-and-... (Accessed: 27 October 2026).
How to cite this article
Tire, G. (2026) ‘How to Choose Skirting Boards and Architraves: Height, Profile and Fitting’, The Flare Journal. Flare Studio UK. Available at: https://flarestudio.uk/blogs/journal/how-to-choose-skirting-boards-and-architraves (Accessed: 12 November 2026).
Shop the style


Conversation
Join the conversation
Questions about the history, a room you are planning, or a piece you have seen in the wild? Leave a comment and Joseph will reply.